Browse Plan Categories

Meet Upsie

Return navigate_next
Your Complete Samsung TV Setup Guide
November 23, 2021 *
Setting up a high-tech new TV can be a daunting prospect, but the process can be easy with a bit of guidance.
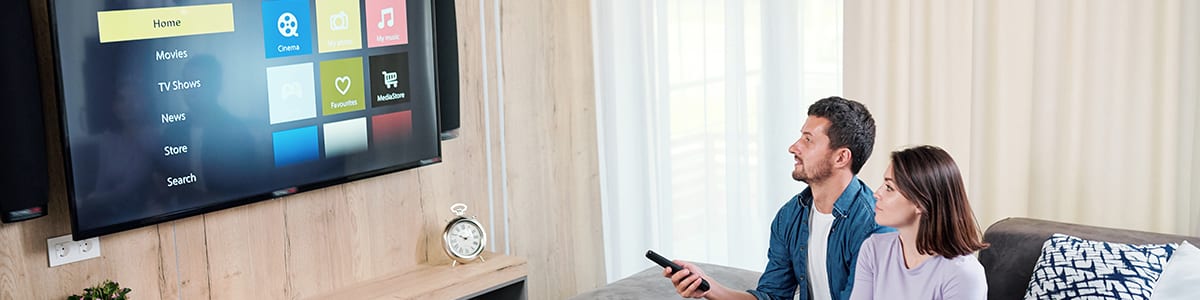
The latest models from Samsung are some of the most cutting-edge on the market. Nowadays, the sheer number of options can seem overwhelming, even to tech-savvy individuals.
The latest models from Samsung are some of the most cutting-edge on the market. Nowadays, the sheer number of options can seem overwhelming, even to tech-savvy individuals.
Thankfully, setting up a new Samsung TV doesn’t have to be overly complicated. Many users will benefit from a few minor adjustments to specific options. However, for the most part, simply getting things up and running is usually pretty quick.
Five-Step Samsung TV Setup Process
To demonstrate how easy it is to set up a new Samsung TV, we’ve broken down the process into just five straightforward steps. Almost all of Samsung’s current TV models, including its top-rated QN90A series, can be set up in this way, as can many of those manufactured in the last year or two.
By following this simple five-part Samsung TV setup guide, you could be tuning in to your favorite shows in under ten minutes.

Step 1. Plug in and Turn On Your New Samsung TV
Once carefully unpacked and plugged in, the Samsung TV setup process starts by turning on the set. Your new TV may switch itself on for the first time once connected to power. Alternatively, pressing the power button on the accompanying remote control should set the wheels in motion.
If neither option works, locate the TV’s physical power button. This physical power button will be somewhere on the set itself, although its precise location can vary from model to model.
Step 2. Check That the Remote Has Paired
A new Samsung TV remote should pair automatically. This automatic pairing is most obviously demonstrated when using the included remote to switch on a set for the first time. In rare cases, a remote may not pair automatically for some reason. This will become obvious if you can’t use the remote to turn the TV on.
To pair a remote manually, simply point it at the TV and simultaneously hold the Back and Play/Pause buttons.
Step 3. Set Your TV’s Language
With your new Samsung TV now turned on and its remote successfully paired, it’s necessary to pick your preferred language.
The set will prompt you to do this automatically. Use the now-paired remote control to select a language option. It’s not possible to proceed any further without picking a language. However, you can change or otherwise update your selection at a later date, should you wish.
Step 4. Connect Your TV to the Internet
All of 2021’s most popular TVs are designed to work at their best when connected to the internet. The latest Samsung models, for example, boast a raft of features that demand a set be internet-connected.
To connect your new Samsung TV to the internet, it’s simply a case of joining a Wi-Fi network or plugging it in via an Ethernet cable. To connect via Wi-Fi, select Wireless from the TV’s settings and pick your home network. Next, enter your password, then select Done.
To connect to a wired network, you may need a separate Ethernet cable. First, plug the Ethernet cable in on the back of the set, then confirm that it established a wired connection via the TV’s settings.
Step 5. Plug in Any Secondary Devices
Today’s Samsung smart TVs are generally ready to watch straight out of the box — thanks to an ever-growing range of services and apps, including those that allow owners to rent or purchase the latest blockbuster movies.
However, you may wish to connect one or more secondary devices, such as a cable box, home theater receiver, or games console. To do this, simply hook them up via their respective HDMI or other cables.
You can set up each device individually. So, for a cable box, for example, you can scan for channels. On the other hand, when working with a game console, you can then sign in to any necessary accounts to access your favorite games and other apps.

And You’re Done With Your Samsung TV Setup!
With your new Samsung TV now up and running, all that remains is to safeguard your purchase with an extended warranty or protection plan. Samsung provides a degree of protection for all new TVs as a part of its standard limited warranty. The manufacturer also sells a range of extended warranty plans.
These and similar plans, including those heavily promoted by big-box retailers and other sellers, offer somewhat enhanced coverage over a longer period, typically of two or three years. However, manufacturer and retailer plans are expensive and often offer sparse protection. Instead, consumers can choose Upsie for comprehensive and affordable warranties.
Upsie’s warranties cost up to 70 percent less than warranties from other warranty providers. Upsie also offers a range of TV warranty packages that last for up to five years. Benefits include protection from screen burn-in, dead pixels, manufacturer defects, and more. Customers can purchase an Upsie warranty for TVs bought in the last 11 months.
Learn More About TVs:
- Compare Upsie Versus Allstate for TV Extended Warranties
- Mini LED Versus OLED: What’s the Difference?
- Setting up a new Samsung TV? With so many options, it can be a daunting prospect. Here’s how to get up and running in under ten minutes.


* This article is over 6 months old and may or may not be updated.