Return navigate_next
How to Install Windows 10 or 11 on Steam Deck
May 11, 2022 *
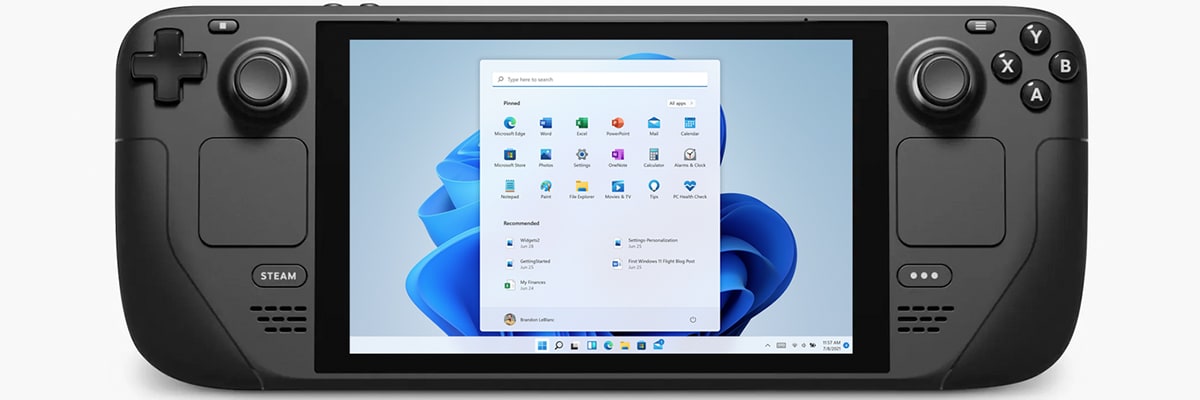
Valve’s Steam Deck is a handheld gaming computer that offers gamers a flexible gaming experience. With the Steam Deck, gamers can enjoy on-the-go gaming similar to the Nintendo Switch. Gamers can also pair the Steam Deck with a gaming monitor and enjoy PC gaming at home. Recently, Valve released a new update that allows users to download Windows 10 or Windows 11 on their device. With this new update, the Steam Deck can be fully utilized as a handheld PC.
Can You Use a Steam Deck as a Computer?
Before the new update, Steam Deck came only with SteamOS, which limited the device’s apps to those downloaded solely from the Steam Library. However, the update allows users to download Windows 10 or Windows 11. As a result, users can download apps outside of the Steam Library.
A TechRadar reviewer even attempted using the Steam Deck as a laptop replacement. The experiment worked — with caveats — and the reviewer could plug the Steam Deck into a monitor and browse the internet.
Installing Windows 10 or Windows 11 on the Steam Deck unlocks even more potential for the device. However, the installation process can be confusing. As a result, we’ve created this easy-to-follow guide to help you install Windows on your Steam Deck.
Installing Windows 10 or Windows 11 on a Steam Deck
There are several methods to install Windows on a Steam Deck. One of the fastest and most reversible ways to install the operating system is with a MicroSD card. For the following steps, you will need a MicroSD card, an SD card reader, and your Steam Deck.

1. Download the Media Creator
Begin by downloading Windows 10 or Windows 11 from Microsoft onto a separate PC. Then, download Rufus. Rufus will allow you to format and create a bootable MicroSD card for installing Windows. You will also need to download the links under “Windows Drivers” on the Steam Support page.

(Image Source: Tom’s Hardware)
2. Set Up the MicroSD Card
Plug the SD card into your computer. Open Rufus and select your MicroSD card and the Windows ISO from the device menu. You’ll choose “Windows to Go” under “Image Option” and choose “MBR” under the section labeled “Partition Scheme.” From the three options under “Advanced Driver Properties,” choose “Use Rufus MBS with BIOS ID.” Finally, press “Start.”

(Image Source: Tom’s Hardware)
3. Plug the MicroSD Card Into Your Steam Deck
After Rufus finishes, turn off your Steam Deck and plug in the MicroSD card. To turn on the Steam Deck, hold down both the volume button and the “On” button. This activates the Boot Manager. From the Boot Manager, choose the MicroSD card. From there, the Steam Deck should automatically boot up Windows.

4. Flip the Screen Orientation
After finishing all the steps, Windows will be up and running on the Steam Deck. However, it will load in portrait mode. To switch it to landscape mode, go to “Display Settings” through “System” then “Settings.” Change the orientation to Landscape.
You’ll find other essential features, like Wi-Fi, GPU Driver, and Bluetooth, in the MicroSD card as well. Once you’ve installed the final features, your Steam Deck is all ready to go!
How to Protect a Steam Deck from Damage
Now that your Steam Deck is ready to reach its full potential as a handheld PC, don’t let a simple accident ruin the device. Because the Steam Deck is fairly new, it still has bugs that make it vulnerable to all kinds of damage. To protect your Steam Deck, pair it with an Upsie extended warranty.
Upsie’s extended warranties for Steam Decks cover everything from accidental damage to hard drive failure. In addition, customers can make unlimited claims up to the purchase price of the Steam Deck. So, if the console has a purchase price of $529 and Upsie repairs it for $100, the customer will have $429 remaining in claims.
Plus, Upsie’s warranties cost up to 70 percent less than warranties from retailers or manufacturers. This means that customers get the best protection at the best price when they choose Upsie. You can purchase an Upsie warranty for any Steam Deck bought in the last 60 days.
Learn More About Gaming Consoles:
* This article is over 6 months old and may or may not be updated.
