Browse Plan Categories

Meet Upsie

Return navigate_next
How to Use a Crepe Maker in Three Easy Steps
September 1, 2021 *
Fresh crepes are delicious. They’re a breeze to prepare, too, especially with a handheld electric crepe maker. Although the process is largely straightforward, success often hinges on following a few crucial steps. For those who haven’t used one before, certain aspects of the process may not be terribly intuitive either.
Are you delving into the delicious world of home crepe-making for the first time? Perhaps you’ve recently purchased a crepe maker and are looking to improve your technique? Whatever the case, be sure to check out this trio of simple steps for the perfect pancake using an electric crepe maker.
How to Use a Crepe Maker: Step 1
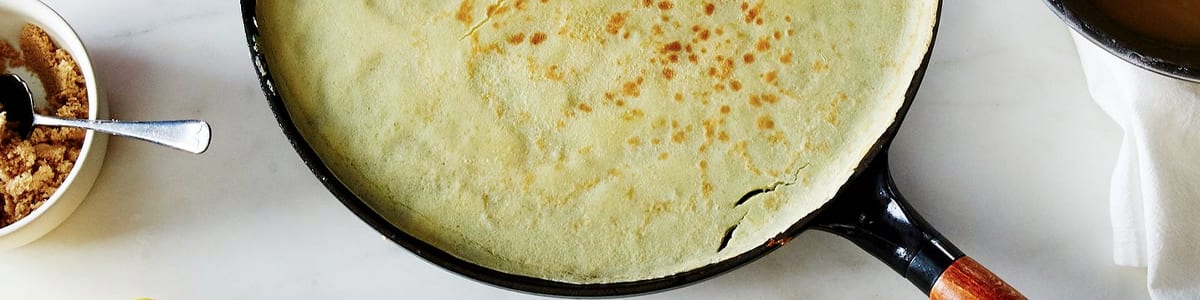
Various handheld electric crepe makers are available from kitchen appliance manufacturers including CucinaPro, Salton, and NutriChef. Prices typically range from $20-$50, but almost all handheld versions work in much the same way, regardless of cost. With that, the first step in successful crepe-making involves preparing your batter and setting up the machine.
For a good batter recipe, check out Alton Brown or Martha Stewart. Follow the instructions carefully and measure out all ingredients as accurately as possible. With your batter ready, turn on the crepe maker. Lightly oil the cooking surface, wipe off any excess, and allow it to heat up.
Once it’s up to temperature, an indicator light should come on. For most crepe makers, this takes around 60 seconds. However, for some models, getting up to temperature can involve a wait of three or four minutes, so a little patience may be necessary.
How to Use a Crepe Maker: Step 2
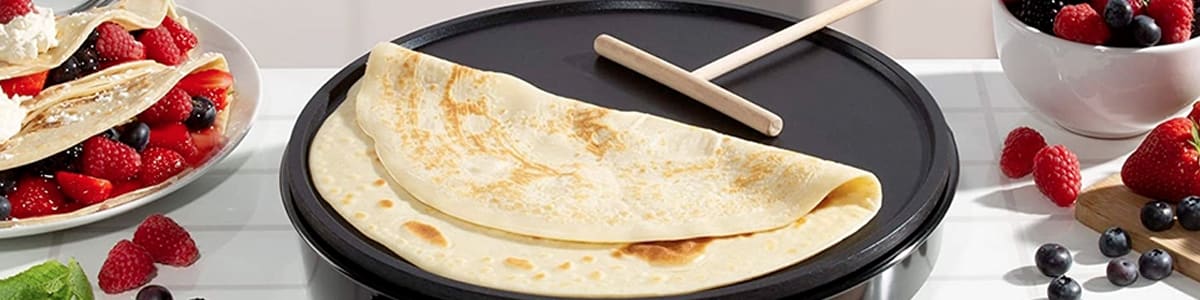
When your crepe maker is up to temperature, pour your batter mix into the accompanying pan. Gently lay the hot, lightly oiled surface of the crepe maker in the mix. Hold it there for around five seconds.
Then, carefully remove it, turn it over, and place the crepe maker—now nicely coated in batter—on a flat surface. Once placed down, the mix should take around 60 seconds to cook.
How to Use a Crepe Maker: Step 3
At this point, the crepe should be ready to slide straight off the pre-oiled cooking surface. If not, loosen the edges with a spatula and shake the maker lightly to free your pancake. Slide it directly onto a plate.
To make more crepes, repeat each step, remembering to oil the cooking surface every time. Once you’re done, set the crepe maker down, turn off the power, and allow it to cool before any further handling. It’s as simple as that! Don’t be disheartened if your first crepe doesn’t turn out as expected, though.
It often takes a couple of tries to get the technique just right. From one brand to another, remember that crepe makers may also heat up and cool down at different speeds, and therefore cook pancakes at varying rates. Accordingly, be sure to tweak the above times if necessary.
For a darker pancake, leave the mix on for longer before sliding it off. For a lighter-looking finished dish, slide it off as soon as it’s possible to do so. More powerful crepe makers can sometimes cook them in this way in as little as 25-30 seconds, meaning that a nice stack of 10 pancakes can take under five minutes to prepare!

Crepe Maker Tips
With pancake-making as easy as one, two, three with a handheld electric crepe maker, a few additional tips may also help you to up your game at the same time.
Keep Your Crepe Maker Clean
It may be pertinent, in fact, to treat this first tip as a fourth step. That’s because tip number one involves keeping your crepe maker clean. After use, and once it has cooled down, wash the pan thoroughly and carefully clean the cooking surface with a damp cloth. Allow both parts to dry completely before packing them away.
Experiment With Crepe Ingredients
Elsewhere, don’t be afraid to experiment with ingredients. Traditionally, crepes use a simple mix of all-purpose flour, sugar, eggs, and milk. However, around the world, pancakes, more loosely, are made with various types of flour, for example.
With that, and by tweaking just one or two ingredients, it’s easy to whip up everything from johnnycakes to blini and blintz using a standard crepe maker.
Protect Your Crepe Maker With an Extended Warranty
Finally, be sure to protect your crepe maker with an extended warranty. Crepe maker warranty packages from Upsie cost as little as $10.99 for three years of coverage. For that, Upsie customers get access to a wealth of benefits including protection for:
- Mechanical faults
- Non-accidental damage
- Power failures
- Power shorts
- Internal cord problems
- Malfunctions resulting in heating issues
If the worst happens and a crepe maker breaks or otherwise becomes faulty, Upsie will see that it’s quickly repaired. Best of all, unlike with many other small appliance warranty providers, there’s no deductible to pay. Furthermore, customers can choose to have their small appliance looked at locally or send it straight to Upsie’s certified repair facility, free of charge. Here, it’ll be promptly fixed and returned via two-day shipping.
What’s more, if Upsie can’t fix it, it’ll be replaced – all at no extra cost. The same benefits apply not just to crepe maker warranties, but to policies for food processors, pressure cookers, mixers, blenders, juicers, toasters, and other small appliances. To find out more or to purchase an Upsie warranty, head to Upsie.com or download the Upsie smartphone app to get started.
Learn More About Small Appliances:


* This article is over 6 months old and may or may not be updated.