Browse Plan Categories

Meet Upsie
Return navigate_next
How to Use a Panini Press for Tasty Sandwiches
June 20, 2022 *
Who doesn’t love a crunchy, gooey panini filled with your favorite sandwich ingredients? Before biting into one, you have to learn how to use a panini press the proper way.
What is a Panini?
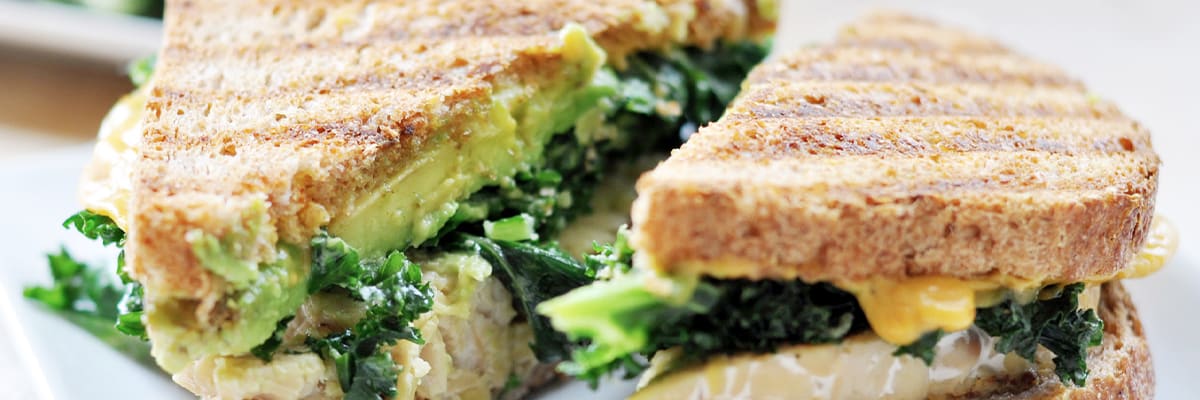
A panini press is a small appliance that presses together hard metal plates to cook food. It’s like an indoor electric grill with a top and bottom that sears food quickly to seal in the flavor. You can use it for sandwiches, vegetables, meats, and more. The word panini is Italian and means hearty sandwich.
A perfect grilled cheese sandwich is one of the best things you can cook in your panini press. It also makes excellent Reubens. Now that your mouth is watering, let’s get started learning how to use a panini press.

How to Use a Panini Press
- Choose your panini press type. You can buy either an electric panini maker or a portable one. The only difference is that with the portable one, you may have to flip your sandwich over to grill both sides while an electric panini press cooks both sides simultaneously.
- Choose a thick, hearty bread for your sandwich. Some excellent choices include ciabatta, sourdough, or rustic wheat/marble.
- Choose your sandwich material. You can go straight for the ultimate grilled cheese or pair it with meats and vegetables.
- Be very selective when picking the type of cheese. You will want it to melt easily and bind the rest of the ingredients together. Some good options are cheddar, gruyere, provolone, fontina, and gouda.
- Before you layer everything on, don’t forget to compliment your creation with a sauce, aioli, mayonnaise, mustard, or other condiments.
- Be sure you don’t overstuff your sandwich; it will spill out and burn the inside of your panini press.
- Now that you have assembled your panini, preheat your panini press according to the instructions. For example, choose 400 and preheat it for 10 minutes. Some machines may have a bell or light that goes off when preheated correctly.
- Before inserting your panini, brush both sides of the sandwich with olive oil, butter, or gee. Coating the outside will give your panini brown a tasty crunch.
- Put your assembled panini in the press and close the lid. Keep a close eye on it as each model may cook differently. Typically, your sandwich should take about five minutes to cook to perfection. Check frequently until you see the brown grill marks and the sandwich looks cooked.
- Remove it carefully with a spatula, and enjoy!
- Turn off your panini press and unplug it. Let it cool before you clean it.
Panini Maker Substitutions
If you don’t have an actual panini press, sometimes you can substitute a waffle maker or crepe maker to get similar results. However, you will want an actual panini press to get it right for the best paninis and award-winning grilled cheese sandwiches.

There are also different types of panini presses you can choose from. You can buy either an electric panini maker or a portable one. The only difference is that with the portable one, you may have to flip your sandwich over to grill both sides while an electric panini press cooks both sides simultaneously. If you’re looking for the easiest and simplest option, choose an electric panini press.
Also, keep in mind that paninis are versatile. You can use a range of different ingredients and even make them diet-specific. For gluten-free recipes, swap out the bread with a gluten-free option. For vegan recipes, use a dairy-free cheese and load the bread with your favorite veggies.
Small Appliance Warranty Considerations
With a panini press, making delicious food couldn’t be any easier. There is no end to the delicious creations you can make for yourself and your family.
However, you should always check the small appliance warranty before investing in a new appliance. Warranties vary greatly, but most manufacturers’ warranties cover only manufacturing defects for a year or less. That means if you plan on keeping your appliance for a long time, you will be without protection if something goes wrong.
The solution is an Upsie small appliance warranty. An Upsie warranty lasts for two to three years, long after the initial manufacturer’s warranty expires. Your appliance is protected from mechanical failure, electrical issues, heating/cooling problems, and much more. In addition, if you sell or give away your appliance, your Upsie warranty goes along with it.
Customers love dealing with Upsie. You can reach claims 24/7, and Upsie costs up to 70% less than options elsewhere. If your small appliance breaks, you can send it in or use a local certified repair technician to fix it. If they can’t fix it, Upsie will replace it on the first claim.
With unlimited claims up to the full price of the item, coverage on new or used items, and the best price available, you cannot go wrong with Upsie!
Learn More About Small Appliances:


* This article is over 6 months old and may or may not be updated.